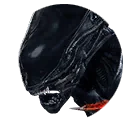
The Xenomorph
Hidden Pursuit: the numbers
Supposedly responding to a distress signal, the Nostromo's crew landed on LV-426. What they found there became one of humanity's greatest horrors. When The Xenomorph is in a trial, a series of tunnels become available to it. By accessing a Control Station, it can enter these tunnels to quickly move around the map, detect the presence of nearby Survivors, and speed up the cooldown time of its Crawler Mode. Exiting a Control Station momentarily deactivates deployed Turrets and tags nearby Survivors with Killer Instinct. SPECIAL ABILITY: CRAWLER MODE The Xenomorph enters Crawler Mode automatically when not on cooldown. In Crawler Mode, The Xenomorph walks on four legs and becomes stealthier, reducing its Terror Radius. While in Crawler Mode, The Xenomorph also has access to a brutal Tail Attack. SPECIAL MAP FEATURE: CONTROL STATIONS Seven Control Stations are scattered across the map. Survivors can interact with these stations to get a Remote Flame Turret, while The Xenomorph can enter and exit the tunnels underneath the Control Stations. SPECIAL ITEM: REMOTE FLAME TURRET Turrets can be placed in the map to counteract The Xenomorph. When The Xenomorph enters the radius and line of sight of a Turret, the Turret attacks; this attack staggers The Xenomorph and can cause Crawler Mode to end. If a Turret successfully knocks The Xenomorph out of Crawler Mode or fires for too long, it overheats, and must be repaired by a Survivor. The Xenomorph can attack Turrets to destroy them. Carrying a Turret makes you immune to detection while the killer is in the tunnel. “Its structural perfection is matched only by its hostility.” – Ash, Science Officer
The power's tunables as the game stores them. Distances and speeds are converted from engine centimetres to metres; everything else is shown as stored.
| Tunable | Value | Note from the game data |
|---|---|---|
| Max walk speed | 4.6 m/s | |
| Carrying camper max walk speed percent | 0.8 | |
| Terror radius | 32 m | |
| ---------------tail attack--------------- | 0 | |
| Tail attack seconds to charge | 0.3 | |
| Tail attack sphere trace radius | 14 | |
| Tail attack length | 480 | |
| Tail attack open time | 0.25 | |
| Tail attack hitting time | 0.4 | |
| Tail attack succeed cooldown time | 2.7 | |
| Tail attack miss cooldown time | 2.5 | |
| Tail attack obstruct cooldown time | 2.5 | |
| Tail attack horizontal offset | 0 | Negative is toward the left of the killer |
| Tail attack start height | 65 | The height used to trigger the collision at the start of the attack |
| Tail attack end height | 65 | The height used to trigger the collision at the end of the attack |
| Tail attack end point height start offset | 0 | The height offset at the start of the attack of the end point of the attack collision compared to the start point of the attack collision |
| Tail attack end point height end offset | -40 | The height offset at the end of the attack of the end point of the attack collision compared to the start point of the attack collision |
| Tail attack debug reticle height | 50 | |
| Tail attack max sweep length | 500 | Limits the horizontal movement of the attack after launching |
| Tail attack emulate gamepad for mouse yaw | 1 | Should we use gamepad emulation to limit turn speed? 1 for yes, 0 for no. Works like billy chainsaw. |
| Tail attack yaw scale | 100 | Limit the camera yaw rotation during the attack |
| Tail attack pitch scale | 100 | Limit the camera pitch rotation during the attack |
| Tail attack rotation speed smoothing time | 0.1 | The time it takes the rotation scaling of the killer's camera to take place when the attack starts. |
| Tail attack rotation speed reset smoothing time | 0.01 | The time it takes for the rotation of the character to get back to normal once the attack is over. |
| Tail attack rotation scale delay time | 0 | Time after the attack is launched before the rotation scale kicks in (Must be between 0 and 0.33) |
| Tail attack view pitch min | -32 | |
| Tail attack view pitch max | 32 | |
| Tail attack cancel slowdown duration | 1 | When cancelling a tail attack charge, the duration of the movement slowdown penalty |
| ---------------special mode--------------- | 0 | |
| Special mode charge time | 35 | The default charge rate of the special mode (i.e. when outside of tunnel and when able to increase charge) |
| Special mode maximum percent on pick up | 0.75 | Percentage of the maximum charge time that the special mode will be when picking up a survivor |
| Special mode charge rate moving in tunnel | 8 | Rate at which the cooldown decrease when walking in a tunnel |
| Special mode decharge rate per attacking turrets | -1.5 | Rate at which the cooldown increase when attacked by a turret |
| Special mode terror radius size | 2,400 | |
| --------------tunnel system---------------- | 0 | |
| Enter tunnel charge time | 0.3 | The time it takes to charge the enter tunnel interaction |
| World to tunnel transition time | 0.25 | The time it takes to transition from the world to the tunnel system when the enter tunnel interaction is confirmed. |
| Tunnel max acceleration | 100 | The acceleration of the killer while in the tunnel system. (Default acceleration is 1) |
| Tunnel survivor detection range | 16 m | The detection distance the killer is able to see survivors moving when in the tunnels. This distance does not take height into consideration. |
| Tunnel survivor detection lingering time | 1.5 | The linger time the survivor is marked to still be detected when getting out of the detection range of the killer. |
| Tunnel survivor detection offscreen indicator visible distance | 0 | The distance the detected offscreen indicators are seen from the killer. |
| Tunnel survivor detection offscreen indicator lifetime | 5 | The lifetime the detection offscreen indicators have. |
| Exit tunnel interaction animation time part1 | 0.5 | The time the first animation should take when the killer exits the tunnel. |
| Exit tunnel interaction animation time part2 | 1.75 | The time the second animation should take when the killer exits the tunnel. |
| Exit tunnel interaction slowdown penalty percentage | 2 | Slowdown penalty that is applied to the time of the exit tunnel interaction when the exit is located near a hooked survivor. |
| Exit tunnel interaction slowdown penalty range | 16 m | The minimum range between the control station and hooked survivor for the exit tunnel penalty to be applied |
| --------------turrets---------------- | 0 | |
| Turret count | 4 | Maximum number of turrets available in the pool |
| Turret spawning duration | 1 | The time it takes for turrets to spawn on a Control Station |
| Turret collect charge time | 1.5 | Charge action time it takes for turrets to be picked up from Control Station |
| Turret carry movement speed penalty | 0.35 | hindering percentage penalty on movement speed while carrying a turret |
| Turret auto destroy time | 30 | The time it takes for a turret to auto destroy when dropped on the ground |
| Turret auto destroy pause survivor range | 6 m | If a survivor is under that distance (in cm) from a turret, the auto destroy timer will be paused. |
| Turret destroyed duration | 60 | The time it takes for a destroyed turret to come back into the pool of turrets |
| Turret deploy charge time | 2 | The time it takes for survivors to deploy a turret |
| Turret undeploy charge time | 2 | The time it takes for survivors to undeploy a turret |
| Turret max damage amount | 125 | How much damage the killer can take before special mode is disabled |
| Turret damage reduction rate | 15 | The damage reduced per second when the killer is not being attacked by a turret |
| Turret stunned after fully damaged duration | 1 | Time being stunned after fully damaged by turret |
| Turret damage reduction delay duration | 1 | Time before regaining health after no longer being shot by turret |
| Turret aura linger duration | 3 | How long the aura on turret remain visible after survivor goes out of range of a control station |
| Turret heat accumulation rate | 0.25 | Percentage per second heat builds up when turret is firing |
| Turret malfunction duration | 3.5 | The duration of the malfunctioning state of the turret |
| Turret motion tracker max detection range | 41 m | Max range at which the motion tracker detects the killer and will start bipping |
| Turret detection radius | 10 m | The radius of the killer detection zone of the turret, in cm |
| Turret heat dissipation rate | 0.25 | Percentage per second heat cools down when turret is not firing |
| Tunnel footstep time between spawn | 0.35 | The time between each footstep spawning when a survivor is detected by the killer. |
| Turret repair time | 3 | Time to repair a turret that's overheated |
| Tunnel tunnel exit blocked time after entering tunnel | 2.5 | The time that the power of the killer is disabled when entering the tunnel, meaning the killer cannot exit the tunnel during this time. |
| Tunnel survivor detection downtime after entering tunnel | 2.5 | The time that the survivor detection system is disabled when entering the tunnel, meaning the killer cannot see footsteps of survivor during this time. |
| --------------control stations---------------- | 0 | |
| Control station turret availability cooldown | 30 | Cooldown after picking up a turret on a control station |
| Control station max distance to reveal aura to survivors | 1,200 | Survivors must be within this distance of a control station to reveal its aura |
| Distance threshold for generator near control stations | 1,600 | If an already spawned control station is closer than this threshold from the generator being evaluated, apply an harsher penalty for spawning a control station near another control station. |
| Exit control station killer instinct range | 16 m | The minimum distance a survivor needs to be from the control station the killer is coming out of for the killer instinct effect to be applied on them. |
| Exit control station killer instinct linger duration | 3 | The linger duration of the status effect applied on survivors close to the control station. |
| ------------------addons------------------------ | 0 | |
| Addon20 effect duration | 20 | The duration of the effect for the K33 power addon (Time where stunning the killer with a pallet injures the survivor) |
| Distance to see tunnel connection aura | 1,400 | The Distance for the killer to see the tunnel connection when nearing an exit |
| --------------miscallaneous----------------- | 0 | |
| Z offset for distance checks when in tunnels | 0 | This is mostly used for perks, and is used to add a Z offset to the current 2D distance between the killer and survivor |
Teachable perks 3
Add-ons 20
 Lambert’s Star Map Uncommon
 Cereal Rations Common
 Ripley's Watch Common
 Ovomorph Common
 Drinking Bird Common
 Crew Headset Uncommon
 Emergency Helmet Rare
 Ash’s Innards Uncommon
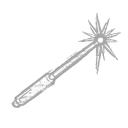 Light Wand Uncommon
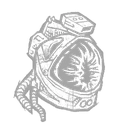 Kane’s Helmet Rare
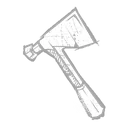 Multipurpose Hatchet Rare
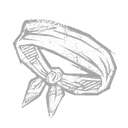 Parker’s Headband Rare
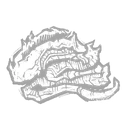 Molted Skin Rare
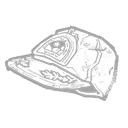 Brett’s Cap Uncommon
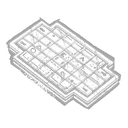 Semiotic Keyboard Very Rare
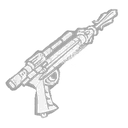 Harpoon Gun Very Rare
 Cat Carrier Very Rare
 Self-Destruct Bolt Very Rare
 Improvised Cattle Prod Visceral
 Acidic Blood Visceral
Overview
- Power
- Hidden Pursuit
- Difficulty
- Intermediate
- Chapter
- Wormhole